Rules
Within this article we are going to see how to create a rule so that with a certain word in our mail it goes directly to a specific folder, in addition to seeing the different types of rules that we can create.
*Important note: All the examples created are directly from the Outlook application for Windows, in other operating systems such as Mac or its Web version you can change the steps.
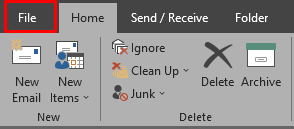
1. We will go to the upper left and click where it says File
2. In the window that was opened, we scrolled and looked for the Rules and alerts option and clicked to access it.

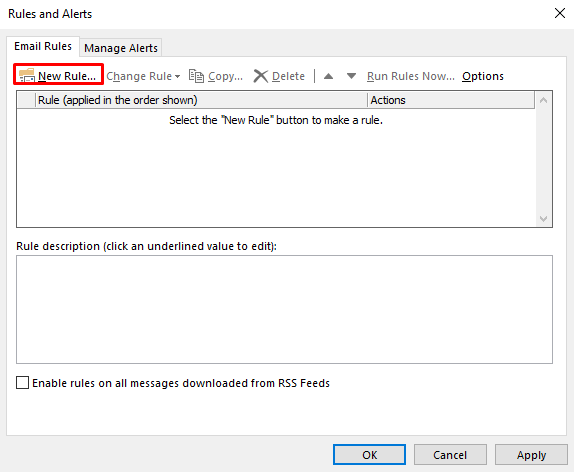
3. A window opens where we can observe the rules that we have already created previously, currently we do not have rules made, so we are going to click where it says New Rule
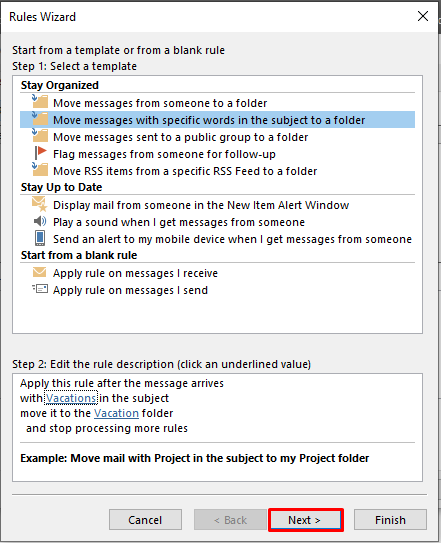
4. Once clicked on new rule, a window called Rule Wizard opens where we are shown the different types of rules that we can create, for this article we are going to create a rule from a word within the subject as shown in the image, this would be Step 1

5. Within the same window in Step 2

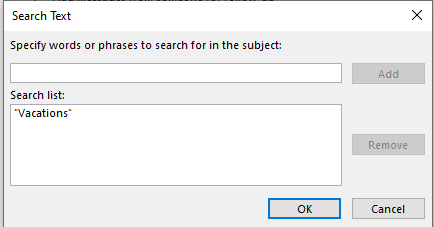
They first apply this rule after the message arrives with a certain text in the subject, we are going to press where the red box is, and a window opens where we will choose our keyword.
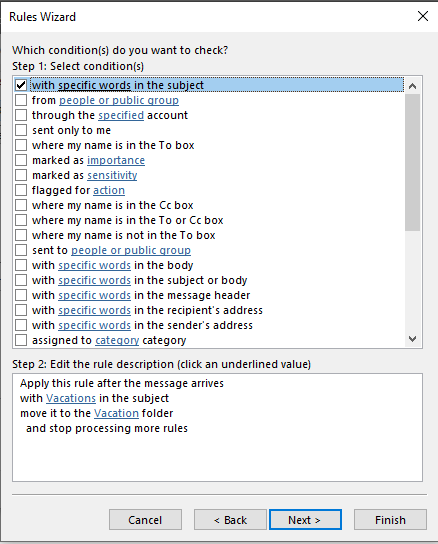
6. For this example we select the keyword Vacations, once the word has been written, we press Add and our word will be located in the Search List section, we press accept.
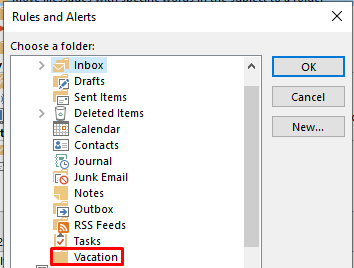
We continue with Step 2, but now with the blue box, here we will select the folder where we want our mail to go.
7. In this case we already have our folder called Vacations that we created previously, if you have not seen how to create a folder and what it is for, I recommend you go to the corresponding article HERE once we select our folder where we want our emails to go, we press Accept
8. Once this is completed we make sure that everything is in order, our keyword and our folder and we press Next
9. When we press next, we can add a new condition, for example with a certain text in the body of the message. In this case, as it is only to request vacations, we will include the same word
10. Click on Next and in the new window it tells us what we want to do with the message, if we have more rules we can indicate that it stops searching and the option to move it to the corresponding folder.

11. We can add exceptions so that if the rules are not followed, the mail will still move.

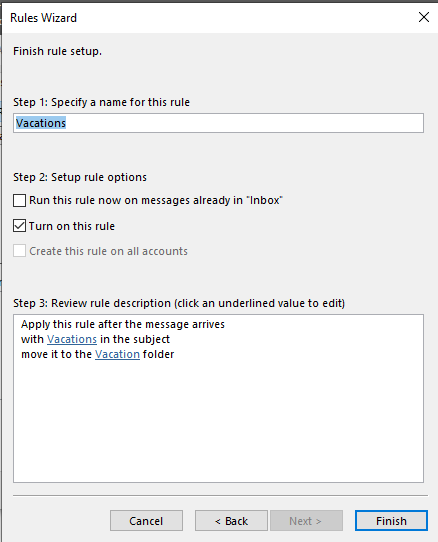
12. We press next and with this we are going to finish configuring the rule, we name the rule, in this case we call it Vacations, but it can be any name, we recommend one that is related to the rule to have better control in the future.
If we want the emails that are already in our inbox to apply this rule, we can check the box, and they will automatically be moved.
We press finish
With this we have finished configuring our rule within Outlook, this is only a part, you can create more rules for your workstation, it's just a matter of trying.
